How to Tape Fingers for Climbing in 7 Simple Steps
To tape your fingers for climbing, start by thoroughly cleaning and drying them. This step is crucial to ensure the tape sticks well and prevents any irritation while climbing.
Next, choose non-stretch climbing tape, which offers the best support without restricting movement.
Cut strips about ½ inch wide to make wrapping easier and more effective.
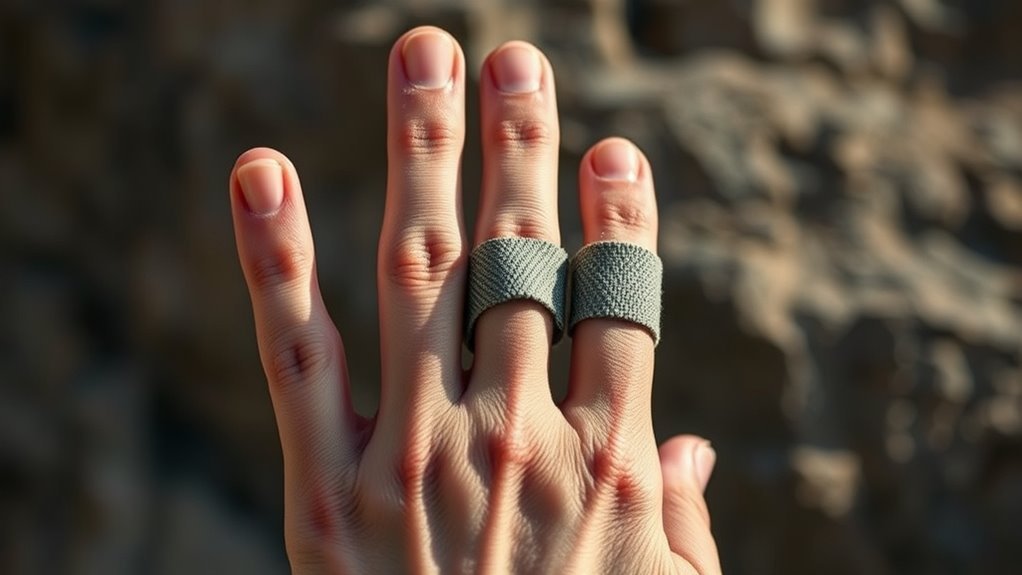
Wrap a base layer between your finger joints with light tension. This base will provide a foundation for the rest of the taping.
Now, form an X or figure-eight pattern over the joint for extra support. This technique helps stabilize your fingers, reducing the risk of injury during climbs.
Overlap the tape as you wrap toward the fingertip, then secure the end with a final wrap.
Make sure the tape feels snug but doesn’t cut circulation. It should be comfortable enough to move but tight enough to provide support.
Keep an eye on comfort to climb safer—and discover the full taping method as you go.
Clean and Prepare Your Fingers
Before you start taping your fingers for climbing, make sure you wash your hands thoroughly with soap and water to remove any dirt and oils. This step is essential to clean your fingers properly and ensure the tape sticks well.
After washing, dry your fingers completely with a clean towel to avoid moisture that can cause the tape to slip. Next, inspect your skin carefully; if you spot any cuts, flappers, or raw spots, treat them before taping to prevent further injury.
Also, trim and clean your nails since long or dirty nails can catch on the tape and cause it to peel. Taking these simple steps will help you prepare your fingers effectively and give your tape the best chance to stay put during your climb.
Choose the Right Tape and Cut Strips
When selecting tape for your fingers, choose a non-stretch, climbing-specific brand like Friction Labs or Eurotape to guarantee strong adhesion and reliable support. Using proper climbing tape prevents injury and enhances grip without restricting movement.
Opt for non-stretch, climbing-specific tape like Friction Labs or Eurotape for strong adhesion and reliable finger support.
Cut your finger tape into strips about ½ inch wide, which lets you apply it precisely without adding bulk. Tear lengths that match the area you need to protect, whether it’s a full wrap or just over a pulley or split.
Pre-cut strips help you tape quickly and accurately during climbs. Before relying on a new tape, test it for stickiness and comfort to avoid surprises.
Picking the right tape and preparing strips carefully ensures your fingers get the best support possible.
Apply the Base Wrap Around the Finger
Start by bending your finger slightly to find a comfortable position, then wrap a quarter-inch strip of tape around the middle section between the first and second joints.
Make sure to overlap the edges just enough to keep the tape secure without restricting circulation.
Keeping the tension light helps maintain flexibility while ensuring the base wrap stays in place.
Start Between Joints
Although you might think taping should begin at the fingertip, you’ll want to position your finger slightly bent and apply the base wrap about halfway between the first and second joints.
This method provides better support and flexibility as you climb. When you start between joints, you ensure the tape moves naturally with your finger.
Follow these steps to wrap around your finger effectively:
- Slightly bend your finger to keep joints relaxed and aligned.
- Begin the tape application halfway between the first and second joint for ideal support.
- Wrap the tape around the finger snugly, covering vulnerable areas without cutting off circulation.
Starting between joints helps protect your finger from strain while maintaining mobility during climbs.
It’s a simple trick that really makes a difference!
Use Quarter-Width Tape
Since proper tape width affects both support and mobility, you’ll want to choose a non-stretchy climbing tape about a quarter-inch wide for your base wrap. Start by cutting a strip roughly ¼ inch wide.
Wrap it once around the middle section of your finger, midway between the first and second joints. Make sure the tape lies flat on your skin without wrinkles or gaps, applying even tension.
Overlap the tape slightly on itself to secure it without cutting off circulation. Keep the wrap snug enough to provide effective finger support while allowing movement to avoid numbness.
This careful application of tape helps protect against climbing injuries by stabilizing your finger joints without restricting flexibility. So, you can climb confidently and safely.
Overlap for Security
How tightly should you overlap the tape when applying your base wrap? You should overlap the previous layer by about one-third to create a secure wrap around your finger. This overlap guarantees the tape stays in place during climbing and protects vulnerable skin or splits.
To apply the base wrap effectively, start by wrapping the tape snugly around your finger, overlapping each layer evenly by one-third. Smooth out any wrinkles or bubbles to improve adhesion and prevent irritation.
Make sure the wrap is snug but not so tight that it cuts off circulation or causes discomfort. It’s all about finding that perfect balance so your fingers stay protected without feeling squeezed.
Create an X or Figure-Eight Pattern for Support
Now that you’ve wrapped the base, it’s time to add extra support with an X or figure-eight pattern. You’ll learn how to apply tape diagonally for the X and loop it in a figure-eight around the joint to stabilize your finger.
These patterns help keep your tape secure and protect your finger during climbs. It’s a simple trick but makes a big difference. Let’s get into it!
Figure-Eight Wrap Technique
When you bend your finger slightly, start taping halfway between the first and second joints to create a secure base. The figure-eight wrap technique helps prevent pulley injuries by providing focused support.
Here’s how to apply the figure-eight wrap effectively:
- Tape vertically from the fingertip down to just above the first joint, overlapping each layer by about one-third.
- Cross the tape inside the joint, wrapping around both sides of the knuckle to form the figure-eight wrap.
- Continue wrapping around the finger, following the pattern to anchor the support firmly without cutting off circulation.
This method guarantees the tape around the finger stays snug, stabilizing key ligaments and enhancing your climbing performance safely.
It’s a simple trick that really makes a difference when you’re climbing!
Applying the X Tape
Although similar to the figure-eight wrap, applying the X tape provides targeted support by crossing a single strip diagonally over the injured area. Start by cutting a strip of tape long enough to cross your finger diagonally.
Anchor the center of the tape over the affected pulley or injury site, making sure it sticks well. Then, cross the tape over your finger to form a clear X shape. This helps stabilize the tendons and pulleys underneath.
Wrap the ends around your finger or hand, securing the pattern firmly but without cutting off circulation. This method gives you solid, focused support while still allowing finger movement. It’s an effective way to protect injured pulleys during climbing.
Benefits of Pattern Support
Because climbing puts intense stress on your fingers, using an X or figure-eight tape pattern provides essential support that helps you climb more safely. These patterns reinforce your pulley system and play a crucial role in injury prevention by stabilizing vulnerable areas.
Here’s why they’re beneficial:
- The X pattern distributes stress evenly across multiple tendons and pulleys, offering flexible support during dynamic movements. It really helps keep everything balanced as you move.
- The figure-eight pattern targets specific joints or pulleys, limiting excessive motion that could lead to tears or strains. This focused support can make a big difference.
- Both patterns create a protective barrier, reducing friction and skin damage from rough holds. So, not only are you protecting your tendons, but you’re also saving your skin from wear and tear.
Wrap Tape Toward the Finger Tip With Overlaps
As you wrap tape toward your fingertip, start at the base and move upward, overlapping each layer by about one-third to guarantee a secure, gap-free hold. Use a narrow strip, roughly a quarter-inch wide, to maintain control and reduce bulk on your finger.
Keep consistent tension on the tape—not too tight to cut circulation, nor too loose to slip. The overlaps are essential; they ensure the tape fully covers the injury or split, providing added stability and support.
Each wrap should build on the last, reinforcing the finger’s structure without restricting movement. By carefully layering with precise overlaps, you create a reliable shield that helps protect your finger during climbing without compromising comfort or dexterity.
Secure the Tape End With a Final Wrap
Once you’ve finished wrapping your finger, secure the tape end with a final wrap that overlaps the starting point to keep everything firmly in place. This last wrap is essential to prevent the tape from unrolling during your climb.
To properly secure the end, follow these steps:
- Apply the final wrap with moderate tension to avoid cutting off circulation or causing discomfort.
- Press down firmly on the wrap to activate the adhesive, ensuring it sticks well and enhances hold.
- Check that the secured end lies flush with the rest of the tape, maintaining a smooth and reliable support.
Check for Comfort and Proper Circulation
Although taping your fingers provides essential support, you need to make certain the tape doesn’t cut off circulation or cause discomfort. After wrapping, check that your finger feels comfortable with no numbness or tingling, which could signal restricted blood flow.
Look at the fingertip’s color—it should remain pink. If it turns pale or blue, loosen or remove the tape immediately.
Keep fingertips pink; pale or blue means loosen or remove the tape right away.
Gently press the nail bed; it should quickly return to its normal color, confirming good circulation. Avoid wrapping the tape too tightly; a snug fit that still allows slight movement helps maintain comfort and blood flow.
During climbing, periodically check your finger for swelling, discoloration, or any discomfort. Making these checks ensures your taped fingers support you safely without compromising circulation.
Conclusion
Now that you’ve mastered these simple steps, your fingers are ready to tackle the crux without feeling “overly challenged.” Taping isn’t just about protection—it’s like giving your fingers a gentle hug, helping them stay steady and confident on every hold.
Remember, a little extra care goes a long way in keeping your climbing journey smooth and enjoyable. So tape up smartly, climb boldly, and let your fingers thank you in their own quiet way.
Using proper finger taping techniques for climbing not only prevents injuries but also supports your joints and skin. This simple practice can make a big difference in your performance and recovery. By following these easy steps, you ensure your fingers stay strong and resilient, ready for every climb ahead. Keep your fingers protected and tape them right to climb with confidence and ease!