How to Stretch Out Rock Climbing Shoes in 10 Easy Steps
To stretch out your rock climbing shoes, start by picking a snug but not painful size. It’s super important that they fit well from the get-go, so you don’t end up with blisters or discomfort later. Wear them at home for short sessions, gradually increasing the time as they begin to mold to your feet.
You can use thick socks or sealed water bags to gently expand tight areas without damaging the shoe. Another trick is to apply heat with a hairdryer or in the oven at around 200°F to soften the materials before stretching. Just be careful not to overheat them!
Freezing water bags inside your shoes is a clever way to target specific spots for expansion. Then, climb gradually in your shoes to help them conform perfectly to your feet.
Avoid harsh methods like boiling or cutting, which can ruin your shoes.
Lastly, take good care of your climbing shoes to keep them lasting longer. Keep going for more detailed tips and learn when it’s best to replace your shoes altogether.
Key Takeaways
- Wear shoes at home for short sessions, gradually increasing time to gently break them in without causing damage. It’s a simple way to get them molding to your feet naturally.
- Use thick socks or multiple pairs to stretch tight areas by wearing shoes around the house. This adds extra padding and helps ease the stretch bit by bit.
- Insert sealed plastic bags filled with water into tight spots and freeze shoes for 1–2 days to expand material gently. The water turns to ice and pushes out the shoe just enough.
- Warm tight areas with a hairdryer or oven at about 200°F (93°C) before stretching to soften materials safely. Just be careful not to overheat anything.
- Apply gentle pressure using hands or a shoe stretcher on tight zones, checking fit regularly to avoid overstretching. Take your time here—slow and steady wins the race.
Why Choosing the Right Size Matters Before Stretching
Before you start stretching your rock climbing shoes, it’s essential to choose the right size. This guarantees a snug fit that supports performance without causing pain.
Getting the shoes too tight, especially around your big toe, can damage both your foot and the shoe material. This holds true even if you use a shoe stretcher or hair dryer later.
Leather climbing shoes like La Sportiva can stretch 1-2 sizes, but synthetic ones stretch less. So, picking the correct fit from the start is key.
You don’t want your rock shoes feeling like a bag on your foot or causing discomfort while walking around. Unlike your street shoes, climbing shoes are designed to be tight.
Proper sizing reduces the need for aggressive stretching and helps preserve their lifespan. Years ago, people didn’t realize this and struggled with break-in.
Wear Your Shoes at Home to Start the Break-In
Although climbing shoes feel stiff at first, you can start breaking them in by wearing them at home for short, seated sessions. Begin with just 1–5 minutes, using the enclosed plastic sheet to slide your heel into a snug but comfortable fit.
If your shoes feel tight around the heel or toes, loosen the fastenings or partially put them on to ease discomfort. Gradually increase how long and how often you wear your shoes over 3–5 nights to gently stretch the material.
Always remove the shoes right after each session to avoid overstretching and keep their shape intact for climbing. This careful at-home routine helps your shoes mold to your feet comfortably without risking damage.
Use Socks or Plastic Bags to Ease Shoe Tightness
You can ease tightness by wearing thick socks or even multiple pairs to gently stretch your climbing shoes. It’s a simple trick that can make a big difference.
Another effective method is using sealed plastic bags filled with water inside your shoes, then freezing them. As the water freezes, it expands and helps stretch the material.
Both ways gradually loosen the fit without harming your shoes. Pretty handy, right?
Plastic Bags Technique
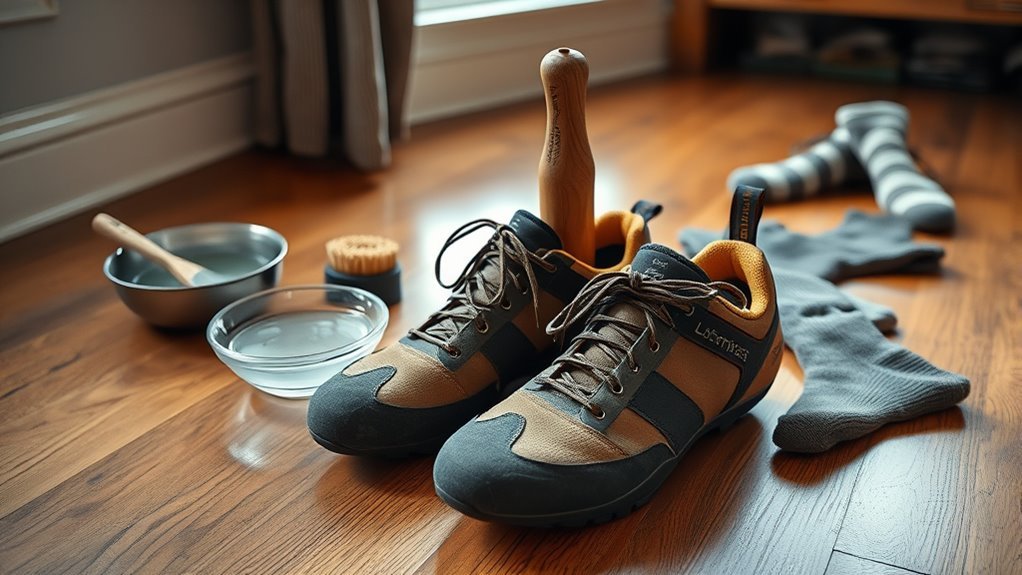
When you want to stretch out your rock climbing shoes without risking damage, try the plastic bags technique. Fill a plastic bag with water, seal it tightly, and place it inside your tight shoe. Then, freeze the shoe for 1-2 days.
As the water turns to ice, it expands, gently stretching the shoe’s material—this works especially well for leather shoes. After freezing, promptly remove the plastic bag and shoes to avoid over-expansion, which can harm the material.
Using socks inside the shoes during this process reduces friction, making it easier to insert and remove them. Always check your shoe’s fit after stretching to ensure comfort and maintain performance.
This method provides a uniform, controlled stretch without causing damage. Give it a try next time your shoes feel a bit too snug!
Wearing Socks Benefits
Since tight climbing shoes can cause discomfort and make stretching challenging, wearing socks or using plastic bags inside them offers a practical solution. By putting on thick socks or layering plastic bags inside your shoes, you reduce friction, making it easier to slip them on and off during stretching.
This barrier also applies gentle, consistent pressure that helps expand the shoe’s volume over time. Warming your feet inside the shoes encourages the materials to soften and stretch more effectively.
Plus, wearing socks or plastic bags during indoor climbing sessions helps mold the shoes to your foot shape without causing excessive pain. This simple, low-risk method leverages body heat and sustained pressure, especially benefiting leather shoes, to gradually ease tightness and improve comfort.
How to Use Heat to Soften and Stretch Your Shoes
Although rock climbing shoes are designed to fit snugly, applying gentle heat can help soften their material and make stretching easier. You can use a hair dryer while wearing the shoes to warm tight spots like the toe box or heel cup, making targeted areas more pliable.
Alternatively, heat your shoes in an oven at about 200°F (93°C) for a few minutes to soften the material uniformly. Just be careful not to overheat them, because excessive heat can cause delamination or warping.
Once warmed, immediately wear the shoes or use a stretching device to expand the softened areas. This method makes it easier to customize the fit without damaging your shoes, giving you a comfortable, secure feel on your next climb.
Try the Ice Method to Expand Tight Areas
Start by filling sealable plastic bags with water and making sure they’re tightly sealed to avoid leaks.
Next, place the bags into the tight spots of your climbing shoes before putting them in the freezer.
As the water freezes and expands, it gently stretches the shoe material in those snug areas.
Preparing Water Bags
When you want to stretch tight spots in your rock climbing shoes, filling small sandwich bags with water offers an effective solution. Start by filling each bag with enough water to leave some space for expansion as it freezes.
Seal the bags tightly to prevent any leaks. Next, carefully insert the water-filled bags into the specific tight areas of your shoes that need stretching. Make sure they fit snugly without overstuffing.
This preparation sets the stage for the ice method, where the freezing water expands and gently stretches your shoes from the inside out. Handling the bags properly guarantees the process works smoothly and avoids damage.
Once prepared, your shoes are ready for the next step in the stretching process. Easy, right? Just take it slow and you’ll get a perfect fit in no time.
Freezing And Expansion
How exactly does freezing water help stretch your rock climbing shoes? When you insert water-filled sandwich bags into tight spots and freeze them, the water expands as it turns to ice. This expansion gently pushes against the shoe material, stretching and loosening those snug areas.
After 12 to 24 hours in the freezer, remove the shoes and let the ice thaw slightly before taking out the bags to avoid damaging the shoes.
Keep these points in mind: freezing applies gradual pressure, preventing sudden overstretching. Plus, the method targets specific tight spots for customized stretching.
Repeating the process lets you control how much your shoes expand.
This ice method is a smart, low-risk way to make your rock climbing shoes more comfortable.
Stretch Tight Spots With a Shoe Stretcher or Hands
Although climbing shoes are designed to fit snugly, you can relieve tight spots by using a shoe stretcher or your hands to carefully expand specific areas like the toe box or heel.
Insert a climbing shoe stretcher into the shoe and turn its adjustment knob slowly to widen or lengthen tight spots over several hours or days.
For smaller areas, apply gentle pressure with your hands, focusing on the sides or toe box.
Heating the targeted area with a hairdryer softens the material, making it easier to stretch. Be sure to check the fit regularly throughout the process to avoid overstretching, which can harm the shoe’s structure or comfort.
This method lets you customize the fit without compromising your climbing shoes. Just take it slow and steady!
Climb Gradually to Mold Your Shoes to Your Feet
Start by wearing your climbing shoes indoors while seated to get used to their fit without pressure. Gradually increase the time you wear them during easy climbs to gently stretch the material.
Once comfortable, switch to outdoor routes to mold the shoes more effectively to your feet. It’s all about taking it slow and letting the shoes shape perfectly to you.
Start Indoors Seated
When you first put on your climbing shoes indoors, sit down comfortably to ease into the break-in process without straining your feet. Use the enclosed plastic sheet to slide your heel in smoothly, reducing friction and initial tightness.
Wear the shoes for short seated sessions of 1–5 minutes, gradually increasing the time over several days. If the fit feels tight around your toes or heel, partially don the shoes or loosen fastenings to relieve pressure during each session.
Once your shoes feel snug but comfortable while seated, you can slowly start incorporating them into indoor climbing to further mold them to your feet.
- Begin seated to prevent early discomfort and foot strain
- Use aids like plastic sheets to ease entry and reduce friction
- Adjust tightness during breaks to maintain comfort and control
Increase Wear Time
As you get used to your climbing shoes, gradually increasing the time you wear them helps the materials mold comfortably to your feet. Start by slipping them on for short sessions, like 1–5 minutes at home or during easy indoor climbs.
Slowly extend these periods over several days to avoid overstressing the shoes. Wearing them consistently while doing low-impact activities—watching TV or running errands—can gently stretch the material without damaging it.
Don’t rush; build wear time incrementally over 3–5 nights to give your shoes time to adapt. Always remove your shoes immediately after use to prevent unnecessary overexpansion, allowing them to maintain their shape while conforming snugly to your foot’s contours.
This gradual approach ensures a comfortable fit that improves with time.
Transition To Outdoors
Although indoor climbing helps break in your shoes, shifting outdoors is essential to truly mold them to your feet. Start by practicing on overhanging gym routes to gently stretch the shoes with minimal risk.
Then, simulate outdoor conditions with vertical laps, gradually increasing the weight on your feet. When ready, take your shoes to the outdoor cliff for initial toproping sessions, focusing on just the first pitches to prevent excessive wear.
Make sure your shoes feel snug but not painful, allowing them to mold effectively without causing hotspots.
- Begin outdoor climbs with controlled, low-impact routes to protect your shoes.
- Gradually increase climbing intensity to shape the shoes to your foot’s unique contours.
- Balance wear and comfort to avoid damage while maximizing fit improvements.
Avoid Harmful Stretching Methods That Damage Shoes
Because rock climbing shoes are crafted with delicate adhesives and materials, you should avoid harmful stretching methods that can cause lasting damage. Don’t use excessive heat from ovens or heat guns, as high temperatures can weaken adhesives and distort the shoe’s shape.
Avoid excessive heat when stretching climbing shoes to prevent adhesive damage and shape distortion.
Also, avoid leaving your shoes in hot cars. Prolonged heat exposure risks delaminating the outsole or causing permanent deformation.
Steering clear of boiling water or uncontrolled oven heating is essential to preserve the shoe’s structure. Never resort to aggressive hacks like scraping or cutting parts of your shoes, as these compromise their integrity.
And please, avoid harsh chemicals or powders that can degrade materials and shorten your shoes’ lifespan. Stick to safe methods to keep your climbing shoes functional and comfortable.
Essential Care Tips to Preserve Your Stretched Shoes
To keep your stretched climbing shoes in top condition, store them in a cool, dry place away from direct sunlight and heat. Excessive heat can weaken materials, causing delamination or deformation.
Always remove your shoes immediately after climbing or stretching sessions to let them air out and maintain their shape. Using natural odor control methods helps prevent mold and bacteria, protecting your shoes’ integrity.
Follow these essential care tips:
- Air out shoes after each use to avoid moisture buildup and odor.
- Store shoes away from heat sources to preserve material strength.
- Regularly inspect for wear or damage and fix issues promptly to extend lifespan.
When to Replace Climbing Shoes Instead of Stretching
Even if you’ve tried stretching your climbing shoes multiple times, you should replace them when they cause persistent pain or numbness. Continuing to wear them can lead to foot injuries, so it’s just not worth the risk.
Also, if your shoes have lost their grip or show significant delamination, it’s better to replace them. Damage like that really affects performance and can hold you back on the wall.
When the materials are worn or deformed beyond repair, stretching won’t restore the fit. Shoes older than a few years with rubber degradation or sole separation also need replacing to guarantee safety.
Finally, if your shoes no longer conform to your foot shape after multiple stretching attempts, it’s time to invest in a new pair. Comfort and peak climbing performance are key, so don’t compromise on fit or safety—know when to replace.
Frequently Asked Questions
How to Stretch Out Climbing Shoes Faster?
You can stretch out climbing shoes faster by heating them with a hair dryer while wearing, then doing light activity like jumping rope. Repeat heating and stretching tight spots to mold the shoes quickly and comfortably.
How to Break in Rock Climbing Shoes Fast?
You can break in your rock climbing shoes fast by wearing them frequently, using a hair dryer to soften the material, and doing short indoor sessions on overhangs. This combination helps mold the shoes quickly to your feet.
How Long Does It Take to Stretch Climbing Shoes?
It usually takes you a few days to several weeks to stretch climbing shoes, depending on material and fit. Leather stretches more, while synthetics take longer or need special methods. Be patient and stretch gradually.
How Do I Widen My Tight Shoes?
Like Odysseus steering narrow straits, you widen tight shoes by using a shoe stretcher or freezing water-filled bags inside them. Gradually adjust or soften material with heat to expand your shoes comfortably over time.
Conclusion
Remember, Rome wasn’t built in a day, and neither are perfectly stretched climbing shoes. Take your time breaking them in using safe methods like wearing them at home or using heat carefully.
Avoid harmful tricks that can ruin your shoes. With patience and proper care, your shoes will mold to your feet, boosting your climbing comfort and performance.
When they’re beyond saving, don’t hesitate to replace them to keep climbing strong and safe. Stretching out rock climbing shoes properly ensures better fit and support, which can make a big difference on the wall. So, stick with gentle techniques and give your shoes the time they need to adjust. That way, your climbing shoes will feel just right, helping you climb longer and with more confidence every time you hit the rocks.